How to Make Rainbow Ice Orbs

rainbow ice orbs

Photo Credit: Child Care Land

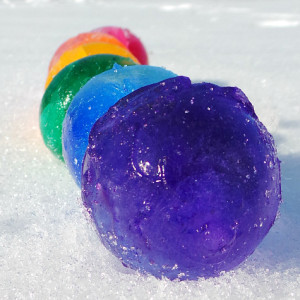
Winter is here and its time for some creative outdoor fun with some rainbow ice orbs! This affordable, fun and easy craft is perfect for the kids on a snow day, for holiday parties, or just to add a little extra décor to the outside of you home! Kids will love experimenting and being creative with this simple project. It’s all about their imagination!

Kids will love experimenting and being creative with this simple project. It’s all about their imagination!

Supplies Needed:

  • Kool-aid powder and/or food coloring
  • Balloons
  • A knife (for adults to handle only)
  • Your imaginations

Instructions:

Take your balloons and put a few drops of food coloring or Kool-aid powder into a balloon, then fill with water. Experiment with the amount of drops to create different color shades. Food coloring makes more of a marbled look, while Kool-aid makes a solid color.

Place outside, if it’s cold enough, or in the freezer over night. Depending on how big the balloons are and how cold it is, this will take about 24 hours. Hold them up to the light to see if they are frozen all the way through. Adults cut off the balloons and reveal the rainbow orbs!

Have fun and get creative! You are only limited by your imagination here. Let the kids take the lead, and be there to offer a helping hand if need be. But, make sure an adult is the one to cut the balloon away from the ice.

Once the orbs are done you can line them up in patterns, maybe a Christmas tree shape on the lawn?! You can stack them or line them along your entryway path. Let the kids decide! What a fun way to bring some color into the white of winter! Have fun and happy creating.

Share your orb creations with us on our Facebook page!

Being Creative With Color – Rainbow Melted Crayon Craft

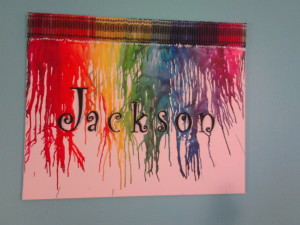
crayon craftKids LOVE crafts, and to be honest, sometimes as parents they are more  of a sticky, crazy messy stress, than any fun. So, I wanted to share an easy and fun craft that both parents and the kids will enjoy together. This rainbow crayon project is fun for everyone, very reasonable to do, and affordable with supplies you have lying around the house.

You can get creative with this project and use it as a bedroom door sign, craft for the baby’s room, or a gift.

How to Steps for the Melted Crayon Craft: 

Supplies:

  • Canvas
  • Glue and Glue Gun
  • Wood Letters
  • Paint
  • Hairdryer

Steps:

  1. Take your canvas (any size) and using a glue gun, attach the wood letters to the canvas. We painted our letters beforehand so they would stand out.
  2. Glue crayons along the top of the canvas. Be creative here with your colors! You can do the normal rainbow order or if your kids have a favorite color, have them use a variety of that shade.
  3. Use a hair dryer to melt the crayons and let the crayons run down the canvas. Pro tip- wear gloves so you don’t have crayon wax stuck to your hands in case you touch the wax before it dries.

Voila! You have a beautiful, colorful, and creative masterpiece! Get creative and share your work with us on Facebook!

Using The Day We Rode The Rainbow In the Classroom

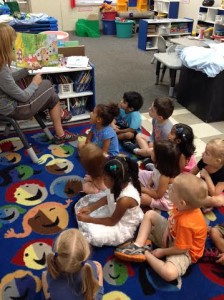
reading the bookThe Day We Rode the Rainbow story is a wonderful tool for teaching compassion, self-esteem and acceptance to children in the classroom or at home. Teachers, parents and students can integrate the book into their learning experience through activities, story telling and discussion. A few schools recently picked up the book and used it in their classrooms. We love seeing schools incorporate this story into their lesson plans to learn together through reading.

A pre-school recently used the book for a complete week of lesson plans. They timed it with the start of the year, when they were learning the letter B, using Butterfly to kick off the theme. They built the story into the classroom culture on how to make everyone feel welcome and make friends with their classmates.

The Day We Rode The Rainbow Lesson plans integrate the following subjects into an engaging, stimulating and fun educational experience:

  • Reading
  • Math
  • Science
  • Arts & Crafts
  • Language Arts

These learning categories are incorporated throughout the week all while teaching valuable lessons of self-confidence and acceptance.

The goal of this lesson plan is to incorporate feelings of respect and welcoming into our first week of class with new students. Throughout the children were encouraged to identify and use words that would help make their friends feel at ease and happy. They also were encouraged to identify the actions and emotions that make them feel good about themselves.

The lessons started with the teacher reading the story of the The Day We Rode The Rainbow to the class. Students were asked questions throughout the story about feelings, emotions, and self esteem. After the teacher promoted the students to think about ‘How can we make our friends feel welcome/happy?

Activities throughout the week centered on this main question. Below are activities that the classroom included in the week and you can choose which ones are right for your classroom or your kids at home:

Art Project:  Students color in a picture of Basil, the main character. This gives the student’s an opportunity to either reflect on the book and how the butterfly looked to them, or express their own creativity.

Craft:  Students will make a picture of a butterfly using their handprints and other decorations to make their unique butterfly. Again at this time, students will be encouraged to complement each other on their work.

Snack:  Students will make a colorful butterfly using a plastic bag, colorful cereal, and clothespins. This is also a fun activity to do at home with your kids after school.

Science:  The class will make a cyclical diagram describing the stages of a butterfly’s life.

Social Studies:  Students can learn and see where butterflies migrate by reading books and using a map of the United States.

Reading/Writing: The class can make a Venn diagram to compare the story Elmer by David McKee with the story we read. The students can find the similarities and the differences between two stories. This can be done using hula-hoops and jotting down the differences and similarities on post-it notes to put in the correct position.


How to include The Day We Rode the Rainbow in your classroom

Teachers, want to see how The Day We Rode The Rainbow can be integrated into your classroom or at home with your children? Get an exclusive coupon code for educators, and download these free lesson plans:

You can pick and choose parts you like or add on your own to fit your teaching style and lesson plans. Share photos of your activities with us on facebook! We can’t wait to see how you use the story.

Art Project for Kids to Build Self Esteem

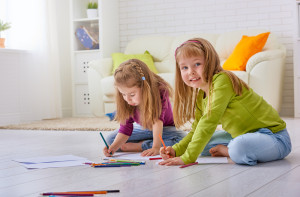
Art projects for kids are a great way to build their self esteem. Spending time with your kids being creative together is important for learning in areas like art, music, social studies, and more. Not only can it create a memory of fun family bonding, or something to do on a rain day, but it also can help kids develop creative thinking skills and confidence. Crafting allows kids to explore ideas, express themselves, and have fun. Art projects can give parents and children a way to explore issues of self-esteem while using self-expression skills. Think of this as a fun way to teach a valuable lesson!

An easy, confidence building and craft for the entire family to do with your kids is making personal silhouettes. This quick craft can be done with little time and effort and is perfect for a rainy day when you are stuck indoors. It can be done with friends, family, or at school. With the addition of a frame, these silhouettes also make a great gift, straight from the heart.

Age range: 5 – 12 years

Time required: 30 minutes

Instructions:

Materials Needs:

  • Flash light
  • Colored paper
  • Stickers, markers, or creative supplies of choice
  • Scissors

Tape a large piece of white or colorful construction paper to the wall. Have the child stand or sit sideways next to the paper. Turn the lights down in the room and shine the flashlight on them so their profile is shadowed on the paper. Trace the shadow in black or their favorite color.

Cut out the profile together and mount it on contrasting piece of paper. Color in the shape with all the things that make them special. Your kid can cut out magazine pictures, use stickers, or word phrases. Does your child love unicorns? Do they love to sing? Are they entranced by the natural world? Put all of these feelings and ideas into your art project using stickers or drawing pictures. For more visual interest, play with items of varying textures. Feathers can be used to make butterfly wings or flowers. Aluminum foil can be used for a shiny effect. A little glue and glitter can make the project sparkle and shine, just like your heart whenever your child walks into the room. As you use these different ideas and materials, take the time to explain how special your child is and how unique they are. They are a true work of art.

Encourage your child to describe the thoughts behind their art choices too. This is a chance for your child to express him or herself! More importantly, this is a great way to teach your child how to verbalize and portray complex thoughts like emotions or character traits. It is also a great way to showcase the special parts of them and build their self-esteem. When you are done you can hang it up or give as a gift.

We think this art project is a fun and creative way to highlight the wonderful things about your little one. We would love to see your works of art, so please share your masterpieces on our Facebook page! We can’t wait to see them.